Simple Slider Tutorial Using Swift
This tutorial shows you how to make a simple but effective slider view for iOS. Although there are a lot of steps here, the actual project is really easy to understand and you can download the completed project if you wish.
This tutorial uses Swift and focuses on just getting the slider on the screen with very basic design. The slider is controlled by buttons, but it is easy to add gesture recognisers instead.
Ok, lets get started…
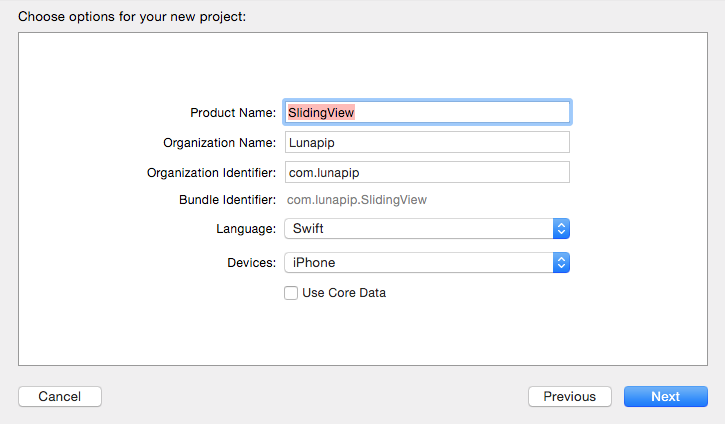
Create a new single view project.

Give the project a name and select Swift as the language and iPhone as the device.
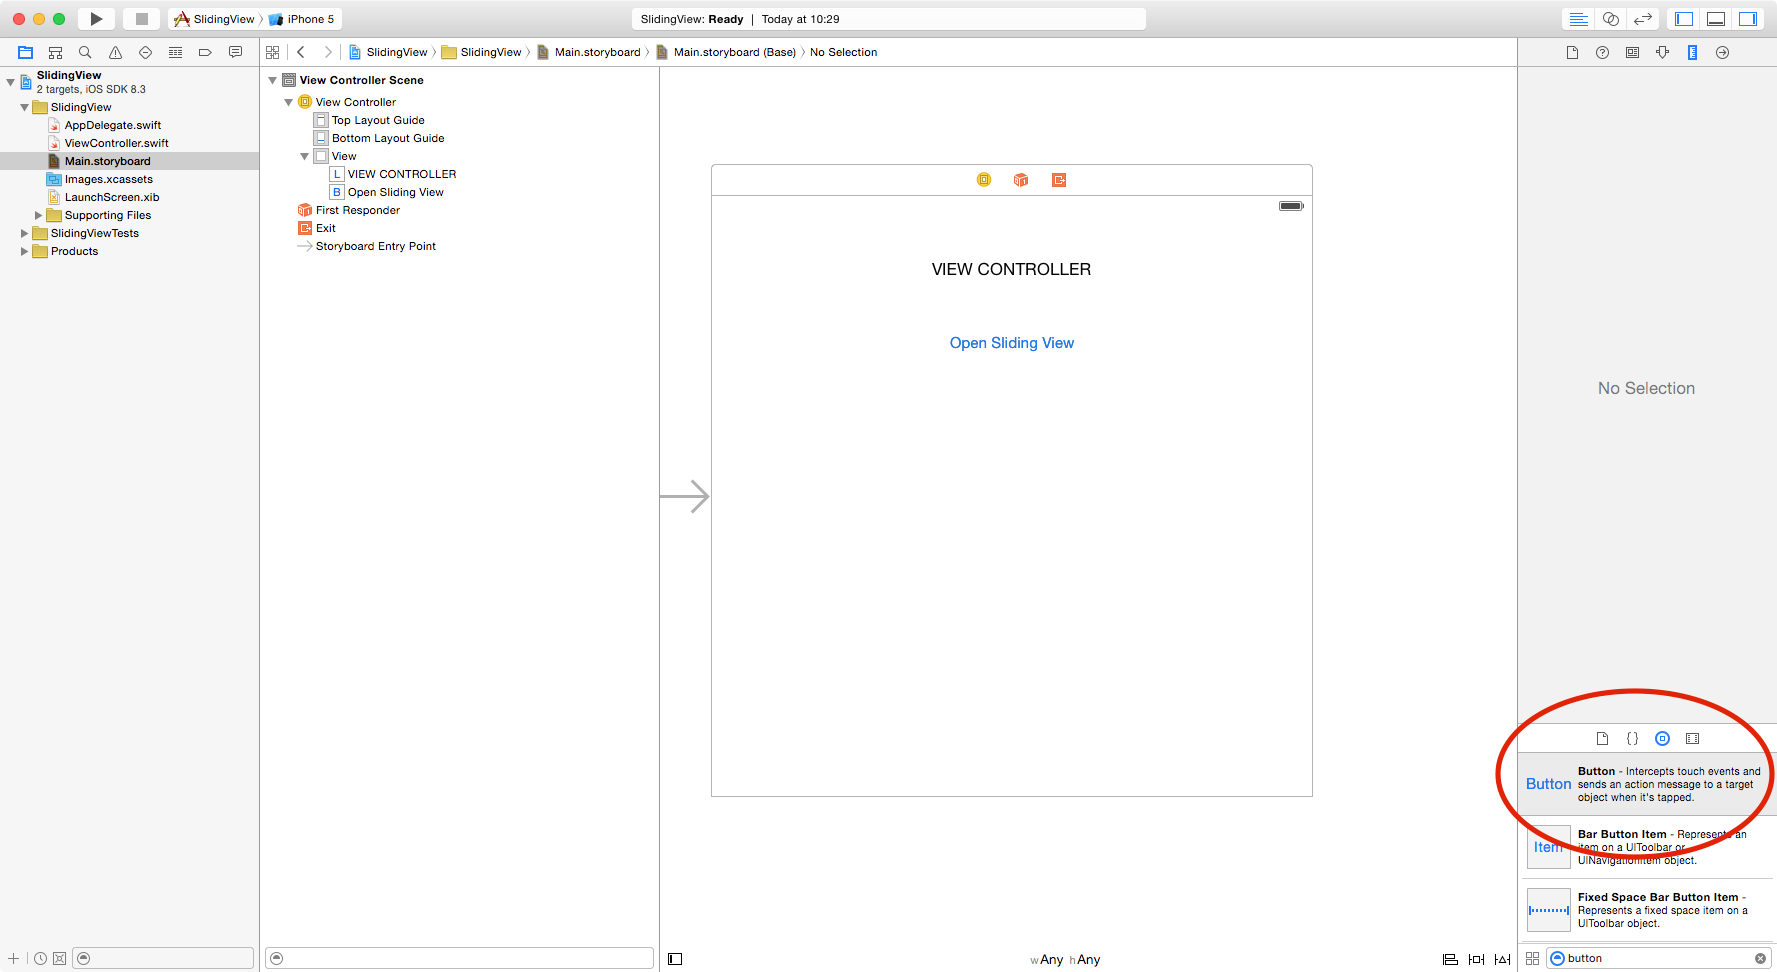
You should disable Auto Layout and Size Classes in the main view as this is a simple example using just an iPhone screen size.
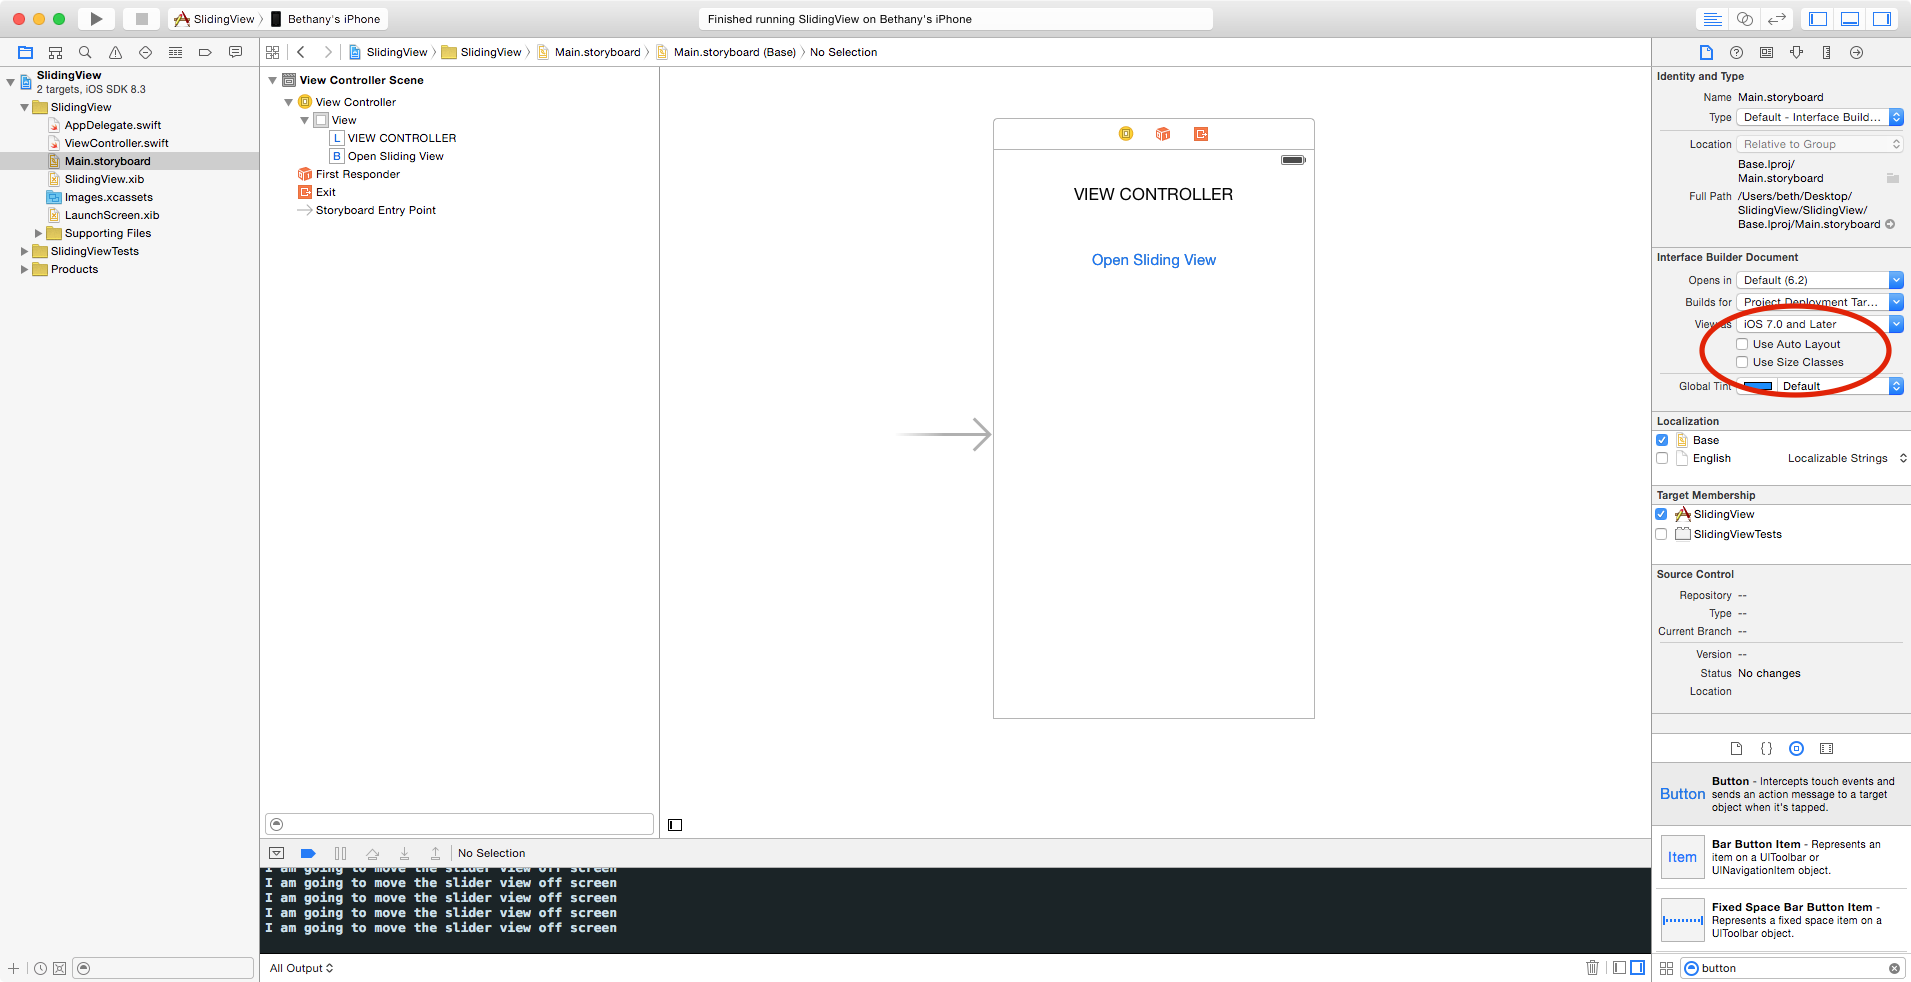
Open the main storyboard then drag a button onto the view.
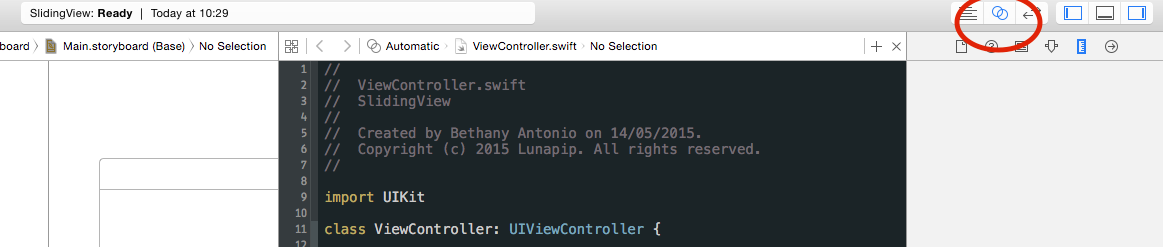
Give the button a title then open the Assistant Editor.
Control drag from the button in interface builder to the ViewController source code in the assistant, give the property a name and click Connect.
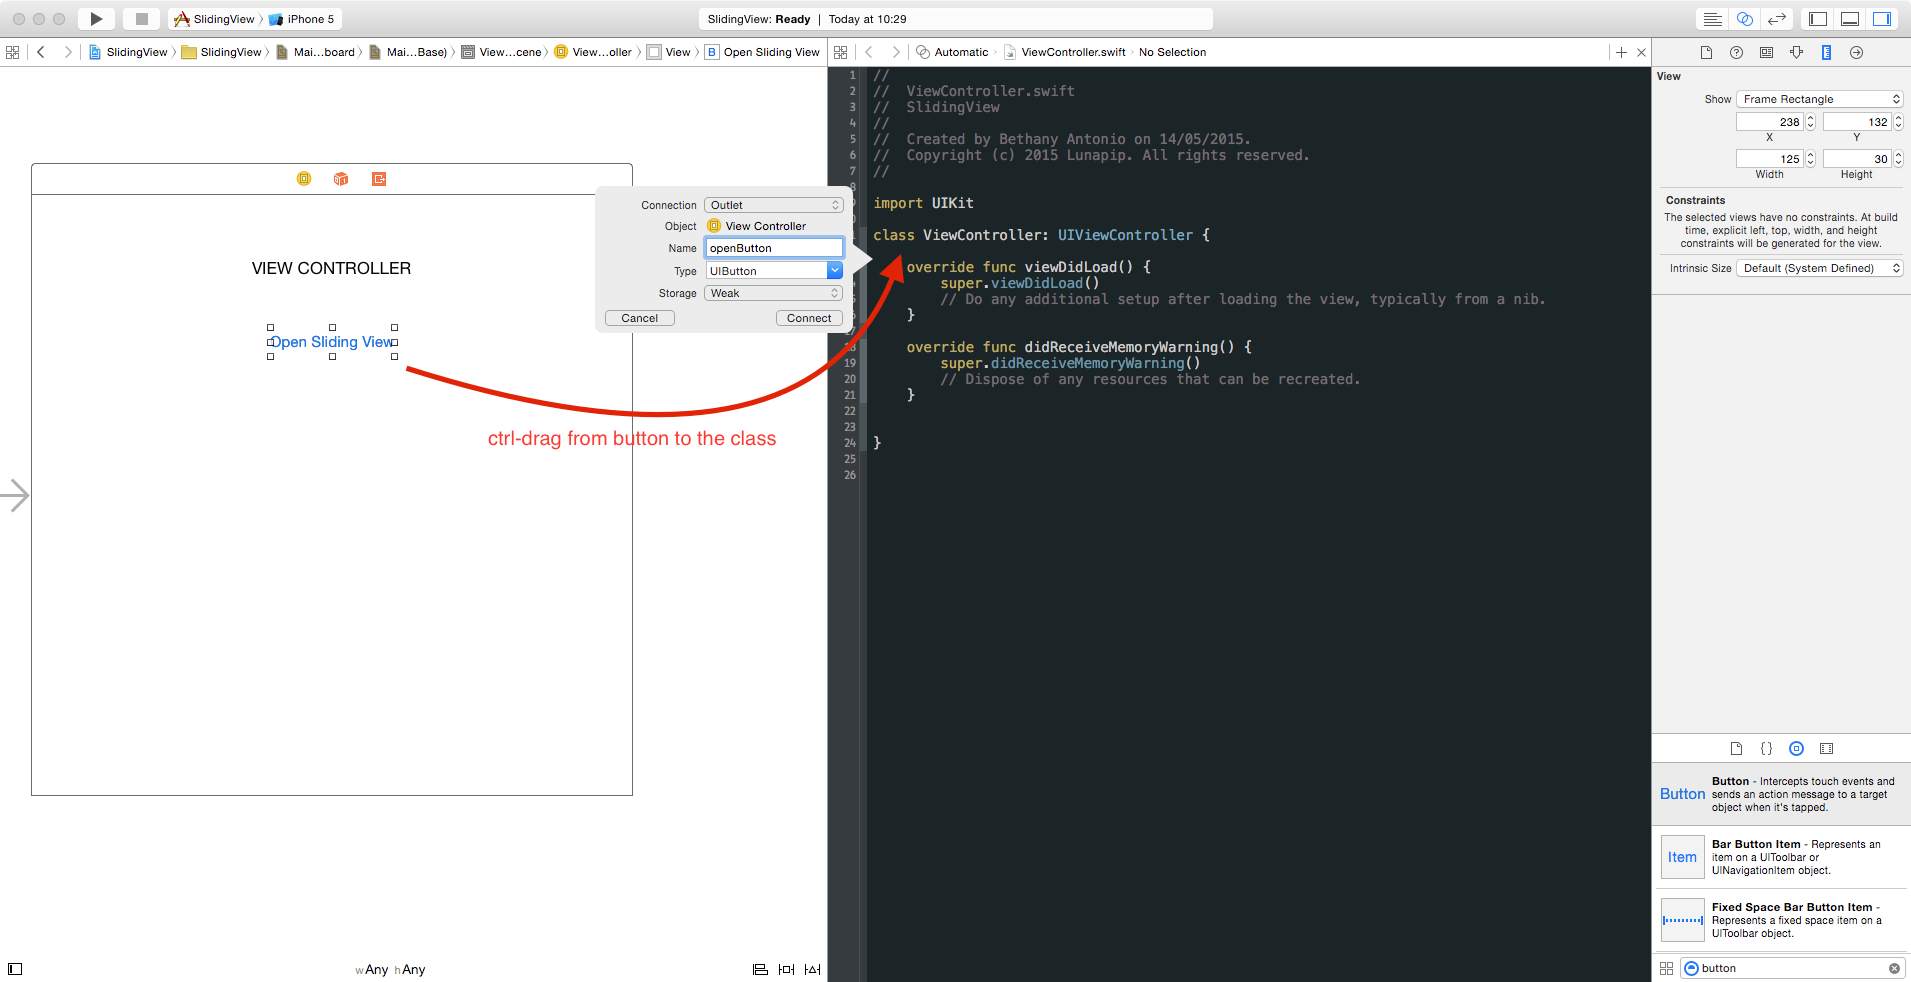
So now we have added an outlet to to the storyboard which looks like this:
@IBOutlet weak var openButton: UIButton!
The Slider View
Next we are going to design our sliding view in Interface Builder.
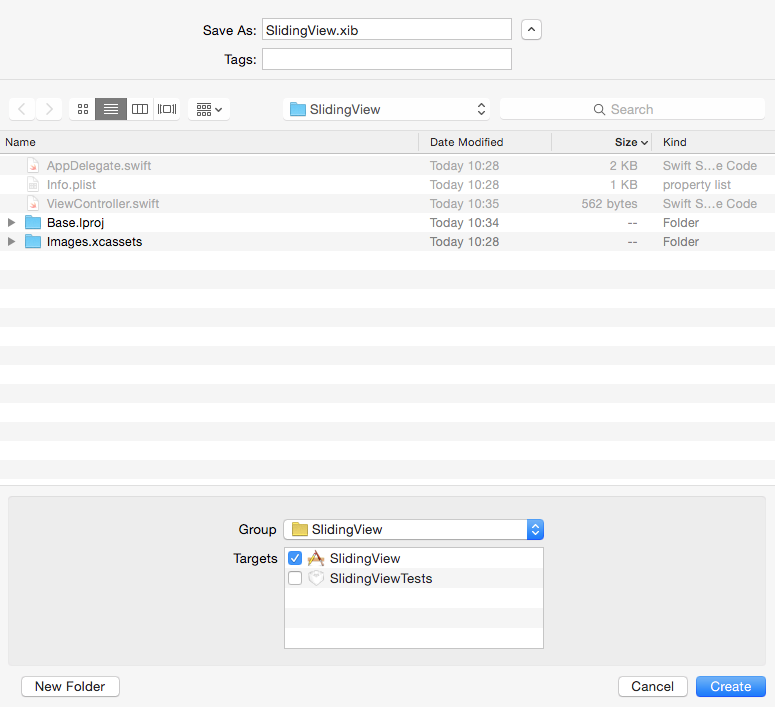
From Xcode choose the File menu, the click New and then click File.
Under iOS, choose the User Interface category and then select View. Click Next to continue.
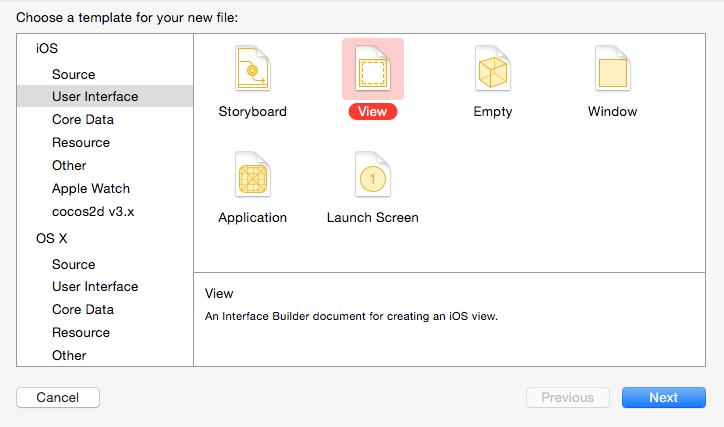
Save the file as SlidingView.xib then click Create.
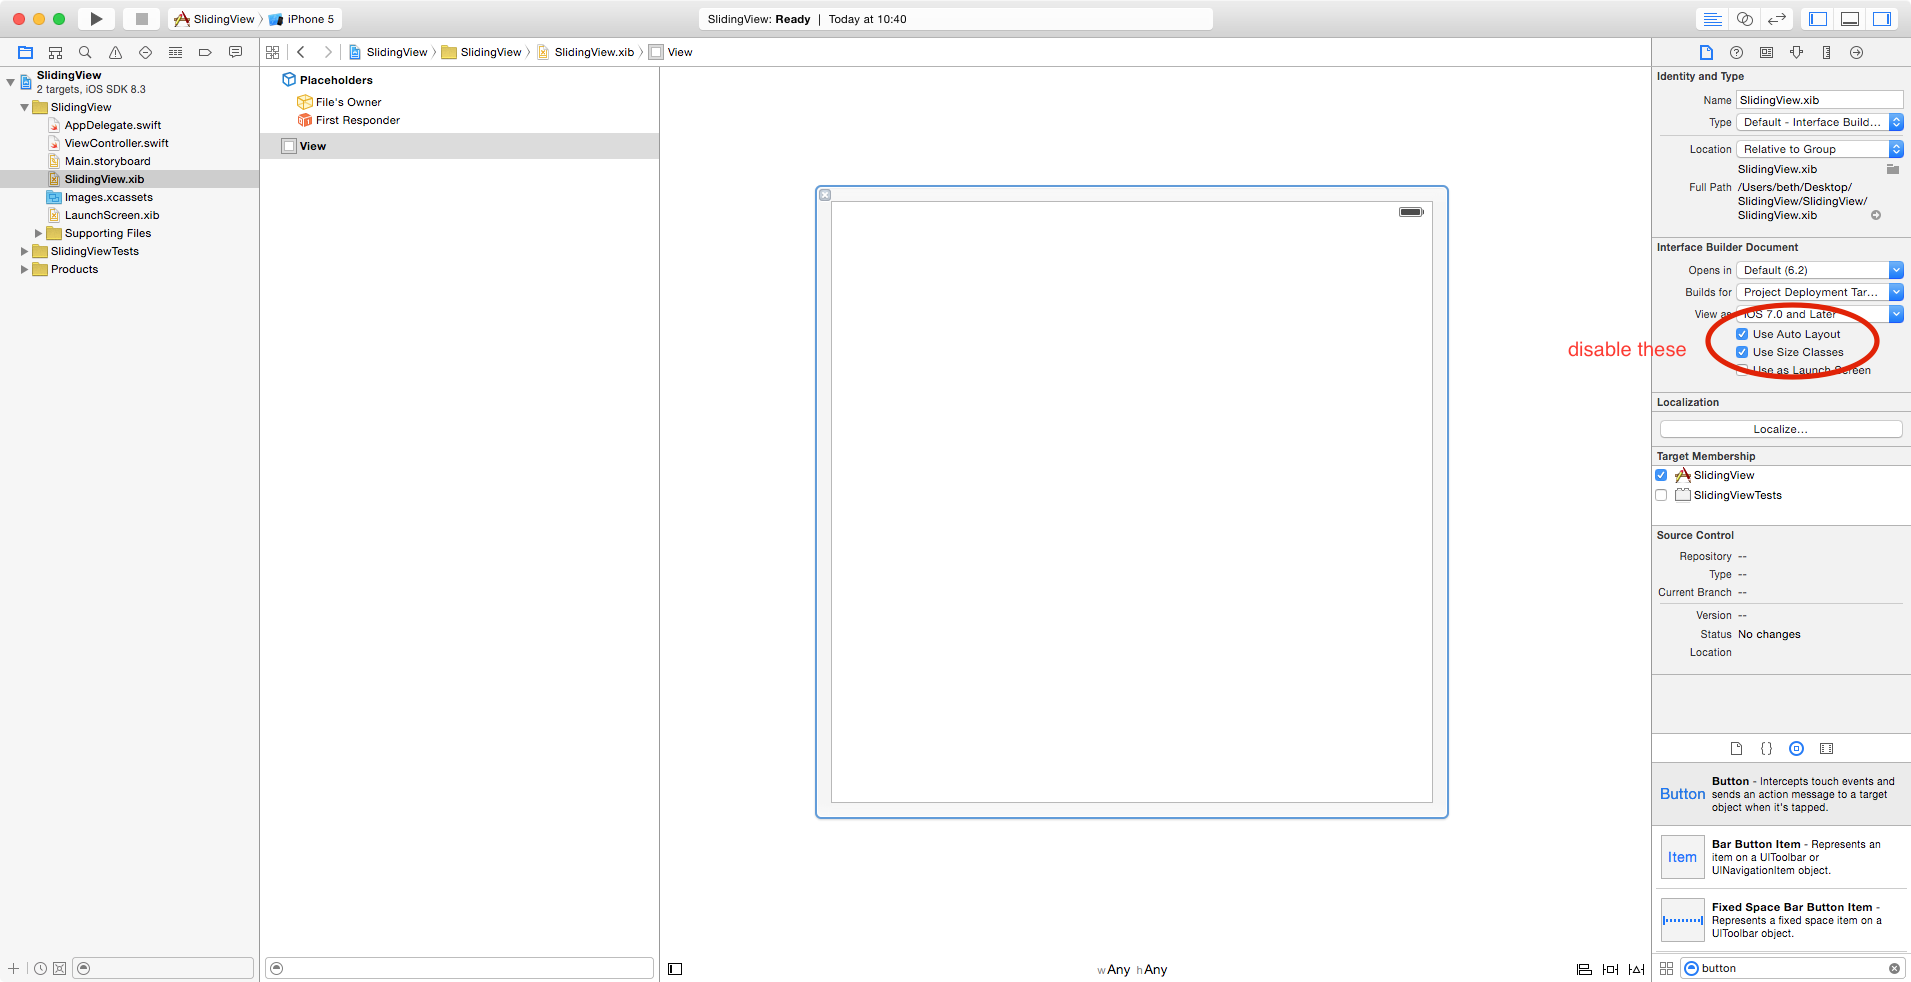
The new view should open up in Interface Builder.
For this simple example we do not not need Auto Layout or Size Classes so disable them from File Inspector.
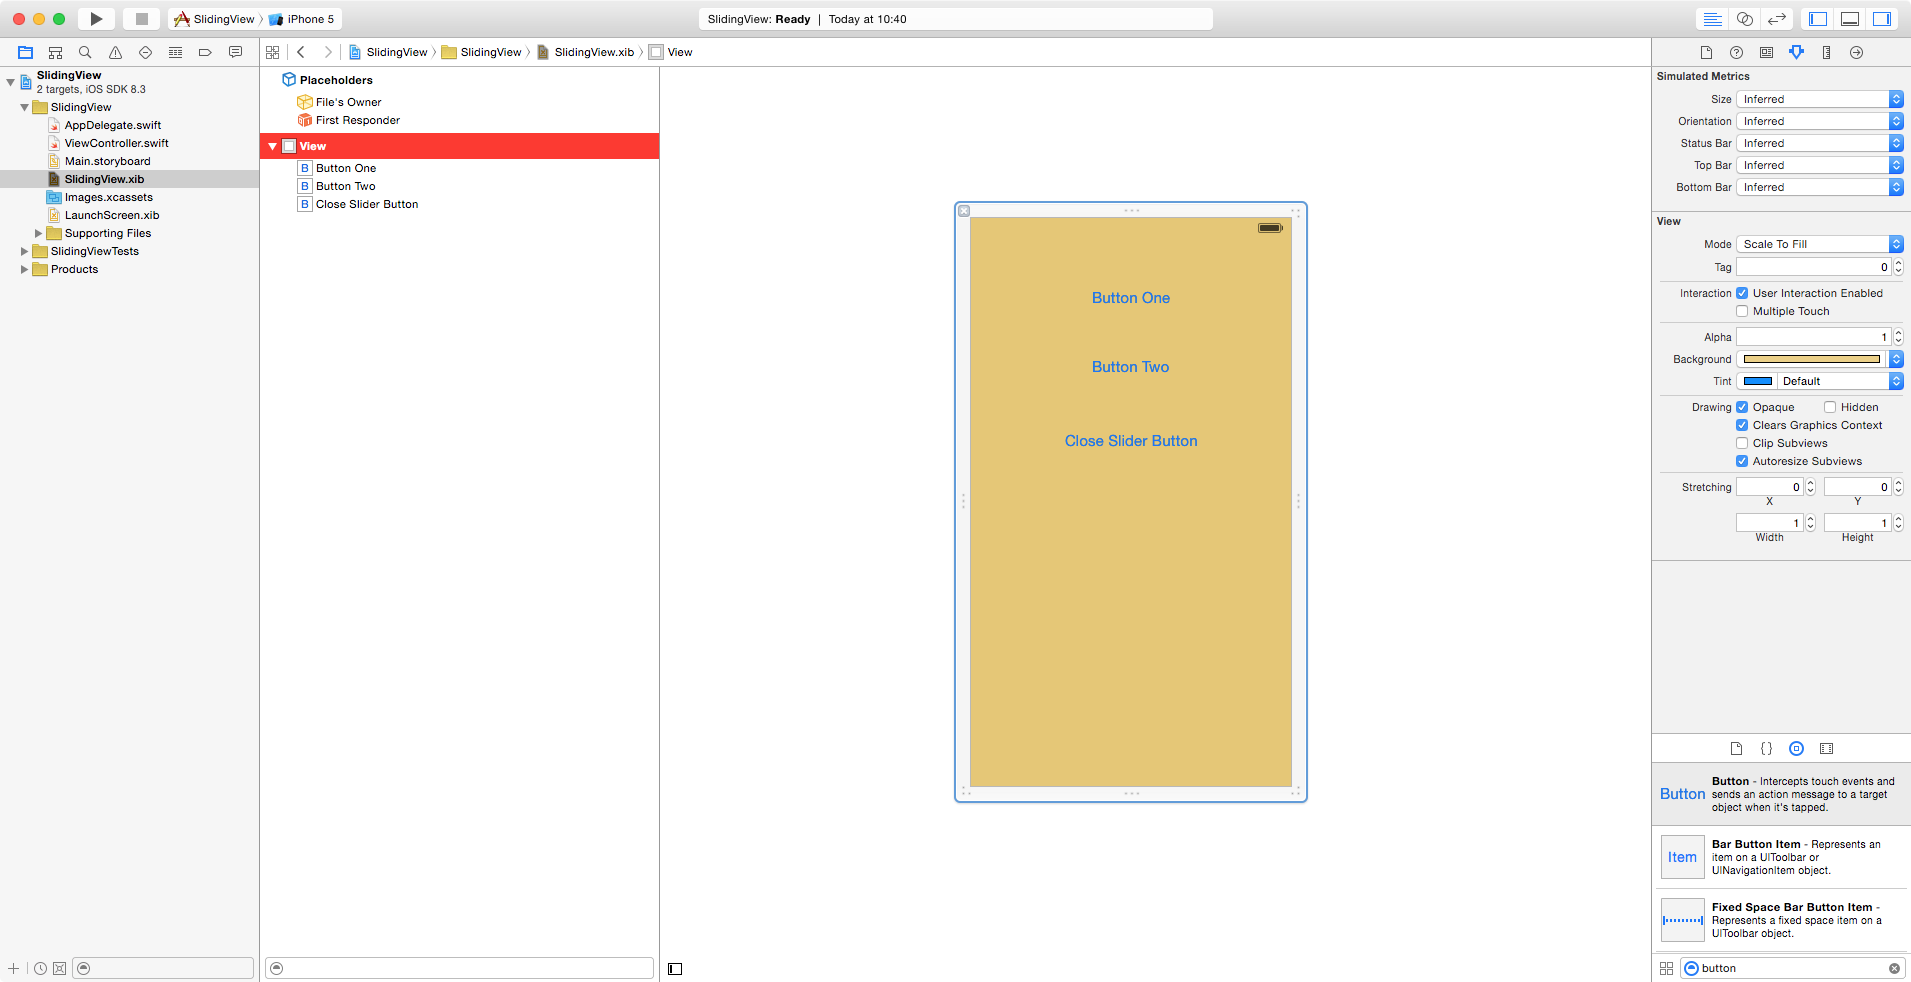
Change the background colour of the view to make it easy to see its dimensions later.
Drag three UIButtons onto the view, position them somewhere and give them all a title. Here’s my example:
We are going to connect these buttons to code in a while, but first we need to create a UIView class to control our sliding view.
Subclassing UIView
You can create the class as a separate file, but for simplicity and to easily see how things are connected we will create it in the same file as ViewController.swift – so open that file up now and add the following code to the top of the file before this line class ViewController: UIViewController
class SlidingView: UIView {
    weak var delegate: ViewController! = nil

    @IBAction func buttonOneTapped(sender: AnyObject) {
        delegate?.sliderButtonOneTapped()
    }

    @IBAction func buttonTwoTapped(sender: AnyObject) {
        delegate?.sliderButtonTwoTapped()
    }

    @IBAction func closeButtonTapped(sender: UIButton) {
        delegate?.sliderCloseButtonTapped()
    }
}
You will see some errors, but they will be fixed now because we have to implement the delegate methods in our ViewController. Add the following code into the ViewController to fix the errors and also provide a method to open the slider.
// Slider Delegate Methods
func sliderButtonOneTapped() {

}

func sliderButtonTwoTapped() {

    }

func sliderCloseButtonTapped() {

}

// Method to open the slider view
@IBAction func openSliderView(sender: UIButton) {

}
We will complete these methods shortly. But first we will go back to Interface Builder and connect the actions in the slider view.
Making The Connections

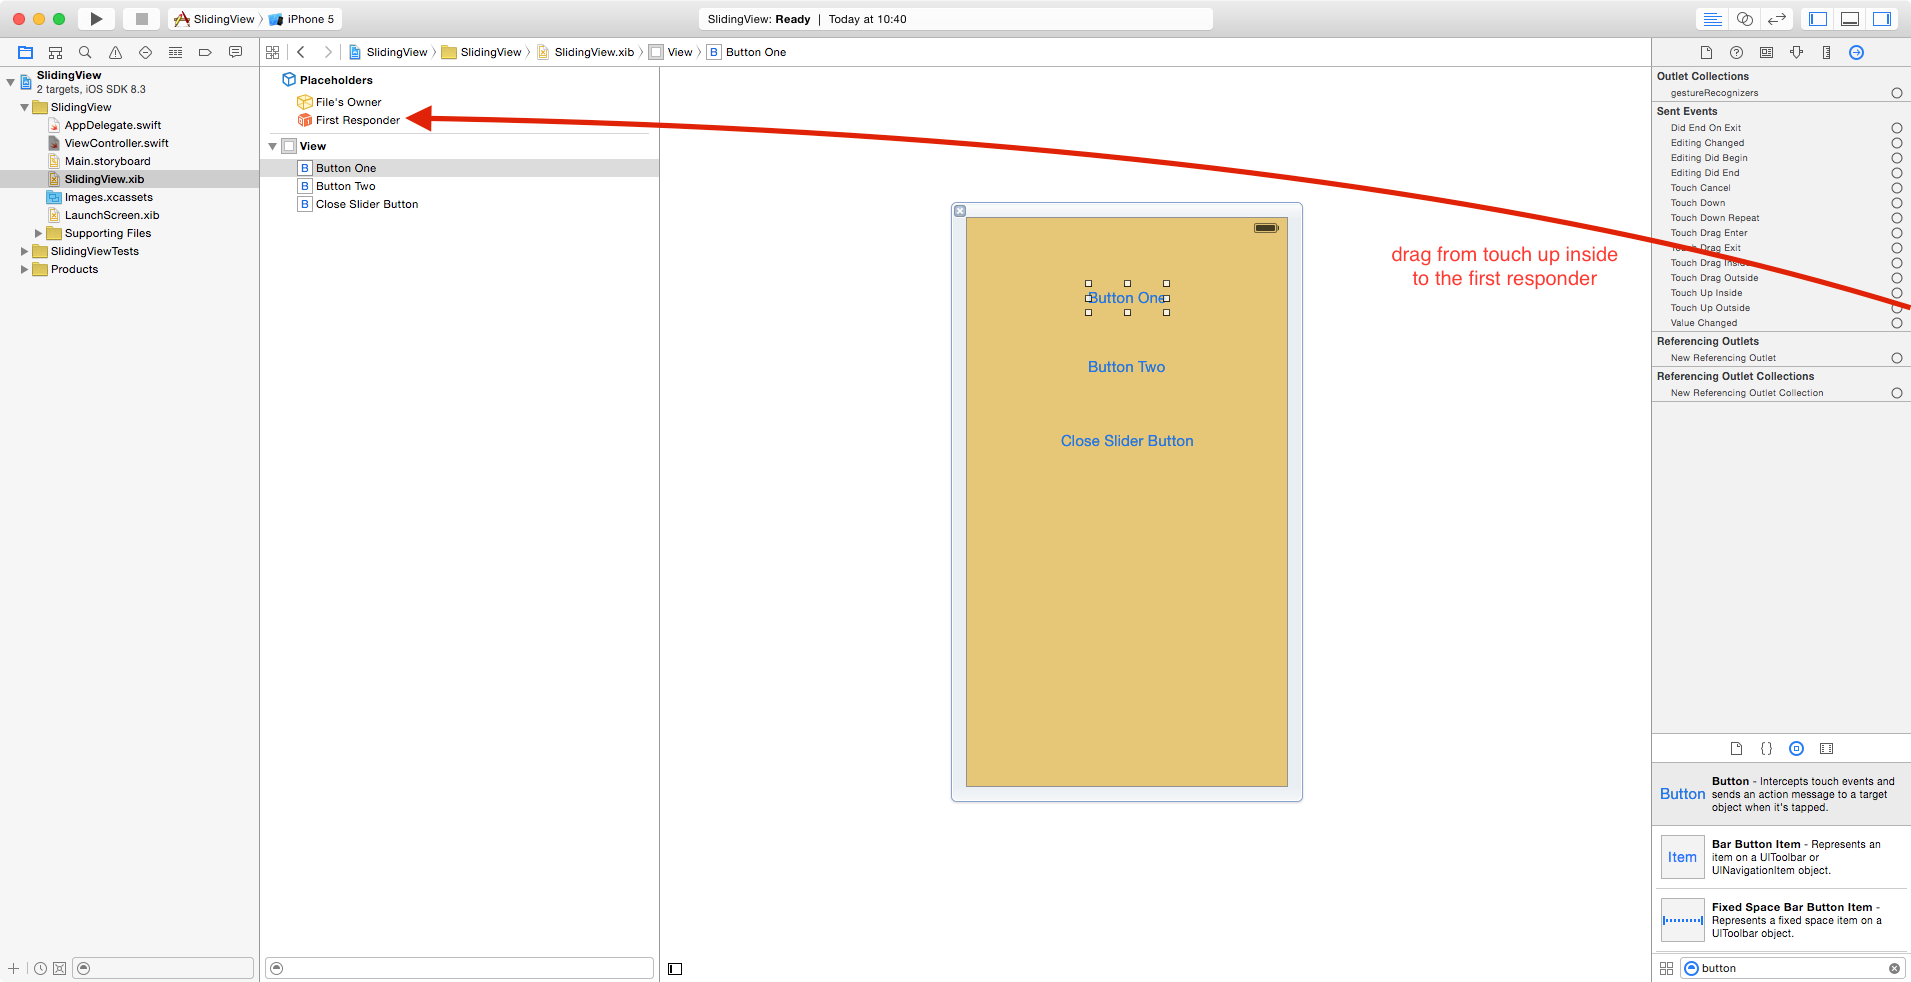
Select the first button and open the Connections Inspector. Drag from Touch Up Inside to the First Responder and select buttonOneTapped: from the popup.
Repeat this for the other buttons dragging to their respective actions. The close button should connect to the closeButtonTapped: action.
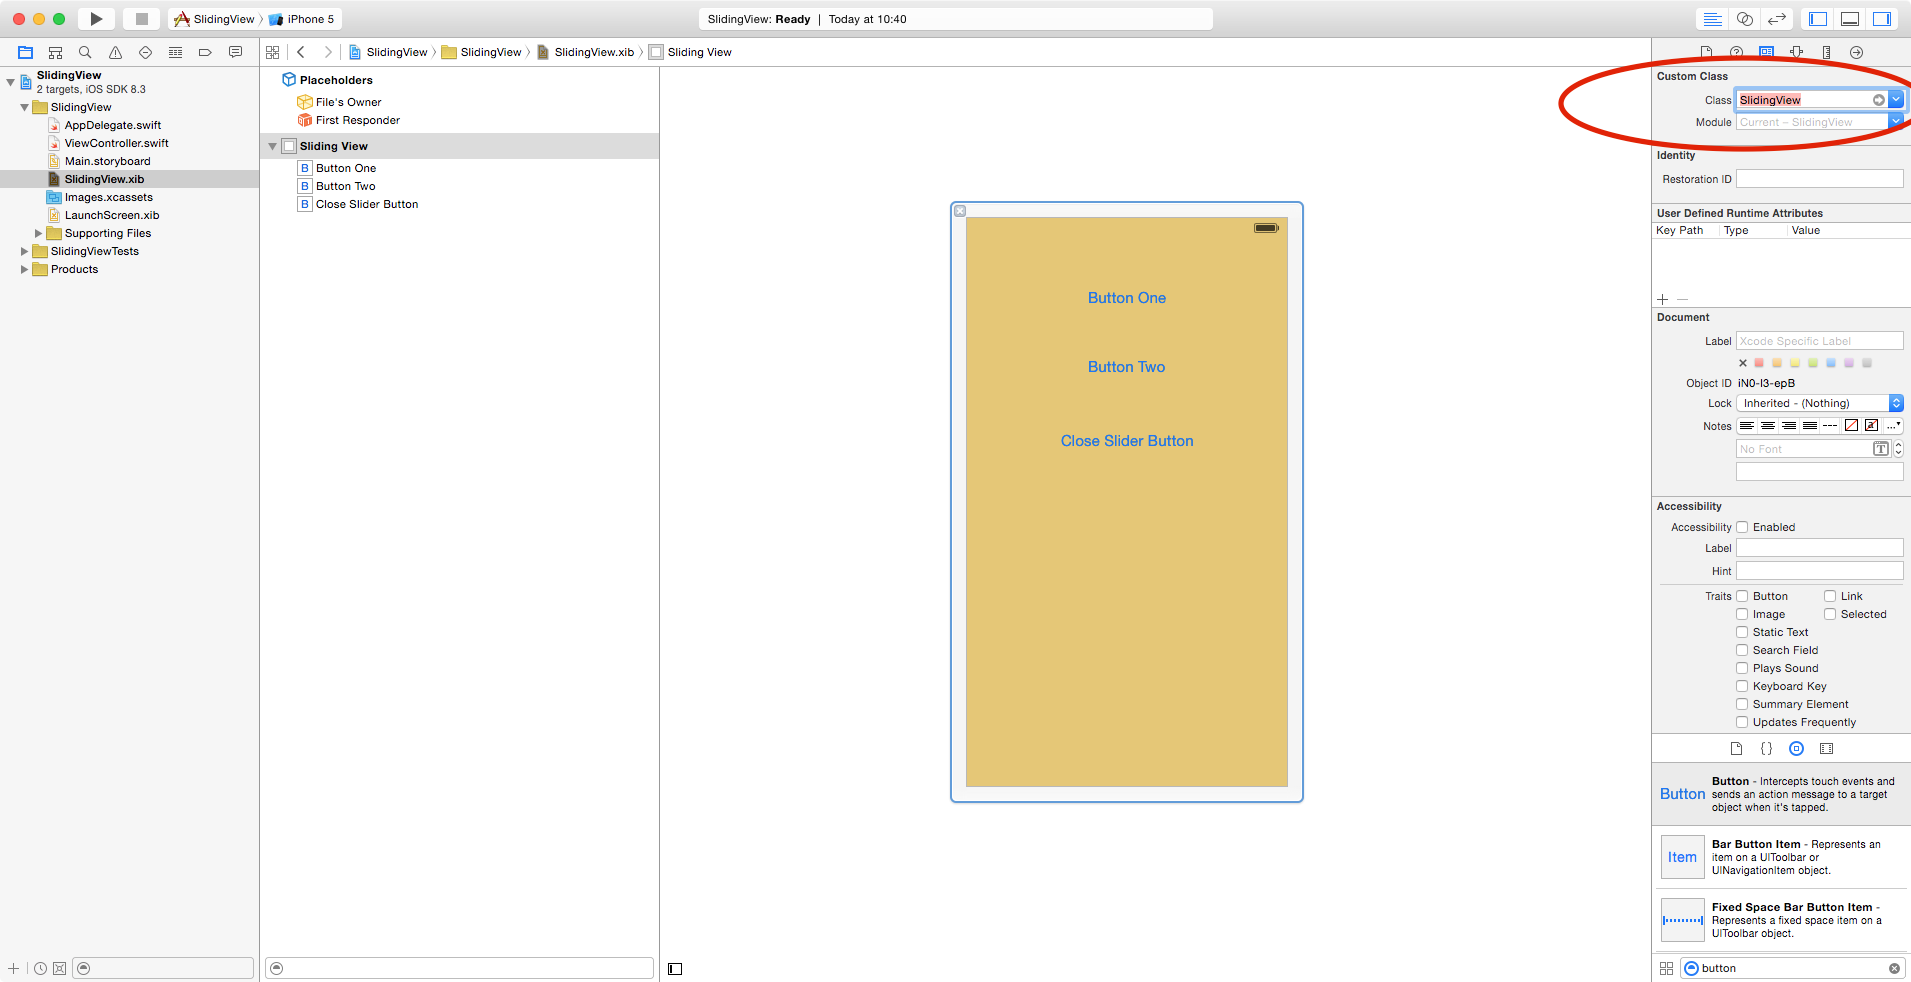
While we are here, we need to tell the view which class it belongs to. To do this select View and open the Identity Inspector.
Adding The Slider To The Main ViewController
Now we have our sliding view created and its buttons connected. Lets move on to adding the slider to the main view.
First add a weak property to the ViewController which holds a reference to our sliding view:
weak var slidingViewNib: SlidingView!Now add a viewWillAppear method which will setup the slider view.
override func viewWillAppear(animated: Bool) {

    // Load the view from the application bundle.
    slidingViewNib = NSBundle.mainBundle().loadNibNamed("SlidingView", owner: self, options: nil)[0] as! SlidingView

    // Decrease the sliding view slightly
    var sliderViewSize: CGSize = CGSizeMake(0, 0)
    sliderViewSize.width = self.view.frame.size.width - 80
    sliderViewSize.height = self.view.frame.size.height - 20
    slidingViewNib.frame =  CGRect(x: self.view.center.x, y: self.view.center.y, width: sliderViewSize.width, height: sliderViewSize.height)

    // Set the centre of the sliding view to be the same as the main view
    slidingViewNib.center = self.view.center

    // Move the sliding view off the screen at the right edge.
    slidingViewNib.frame.origin.x = self.view.frame.size.width + slidingViewNib.frame.size.width

    // Makes a delegate connection between the ViewController and the instance of SlidingView
    slidingViewNib.delegate = self

    // Add the instance of SlidingView (slidingViewNib) to the main view.
    self.view.addSubview(slidingViewNib)
}
To get the sliding view to appear we just need to make a connection between the button in Interface Builder and the openSliderView method in our ViewController.
Do the same as we did earlier by opening Interface Builder, select the Open Sliding View button from the main storyboard and then open Connections Inspector. Drag from Touch Up Inside to the ViewController and select openSliderView: from the popup.
Calling The Slider View
We have a method that is called when the button in the ViewController is tapped to open the slider. We just need to implement the details of that method as follows:
// Method to open the slider view

// This adds 80 points to the x position, keeping the slider at the right of the screen

@IBAction func openSliderView(sender: UIButton) {
    UIView.animateWithDuration(0.5, delay: 0.2, options: UIViewAnimationOptions.CurveEaseInOut, animations: {
      self.slidingViewNib.center.x = self.view.center.x + 80
    }, completion: {
      finished in
    })
}
We’re getting close to completion now. The slider is designed and as the main view is loaded so is the slider from it’s xib file. The slider is then moved off screen ready for activation. We can bring the slider into view now with the openSliderView method and you can test this out now if you want.
Implement The Delegate Methods
The final part is to implement the delegate methods so they can perform actions when the corresponding button is pressed in the slider view. First locate the following methods in the ViewController class.
sliderButtonOneTapped()
sliderButtonTwoTapped()
func sliderCloseButtonTapped()
The first two methods will just log a message to the console to demonstrate that they are working. The third method will close the slider.
Update the methods as show below:
// Slider Delegate Methods
func sliderButtonOneTapped() {
    println("Button one in the slider view was tapped")
}

func sliderButtonTwoTapped() {
    println("Button two in the slider view was tapped")
}

func sliderCloseButtonTapped() {
    println("I am going to move the slider view off screen")

    // Animates the slider view back off the screen to the right
    UIView.animateWithDuration(0.5, delay: 0.2, options: UIViewAnimationOptions.CurveEaseInOut, animations: {
        self.slidingViewNib.center.x = self.view.frame.width + self.slidingViewNib.frame.size.width
        }, completion: {
            finished in
    })
}
Now you have a UIView slider that can be called and dismissed. The view slides over the content below. You can make all sorts of customisations to this view. For example, you could change the size, change the speed of the animation or add cool bounce effects.
Using the delegate methods you can have communication between the slider and the view that called it, for example to populate the slider with data.
You could also add gesture recognisers which would let you pull the slider out with touch.
Hope you found this tutorial useful.
Beth